Making flock for the trees is going to be a breeze, but it will take some time to dry. I should have done this days ago, but in all honesty, forgot all about making it.
 In a large mixing bowl (guys, ask before you take because this is going to stain whatever you use), mix the paint with 5 parts water. Put the lid on the bottle and put it a side for a later use. Waste not want not, right? You will need it later, promise!
Once you have that done, add in 3 cups of fine sawdust.
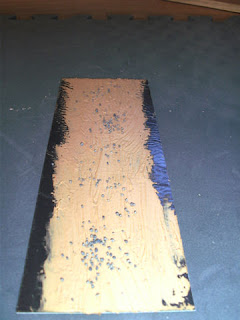
 Start mixing. Keep going until you have no big clumps. If you still have clumps and everything is mixed together, add a LITTLE more sawdust. Once it's all mixed, line a board with wax paper. Place the sawdust on the wax paper and put it in a place that no one will mess with it (animals, ie cats can be a bane on this one). Now you let it dry. This can take up to 2 or 3 days depending on thin of a layer you put on the wax paper. Mine is pretty thick as I'm running out of room for all the projects I have going on at the moment. I'll check it every day for the next 3 days, stirring it up when I walk past it.
Start with a cheap bottle of acrylic paint. For this batch, I'm going to use a dark green.
In a large mixing bowl (guys, ask before you take because this is going to stain whatever you use), mix the paint with 5 parts water. Put the lid on the bottle and put it a side for a later use. Waste not want not, right? You will need it later, promise!Once you have that done, add in 3 cups of fine sawdust.
Start mixing. Keep going until you have no big clumps. If you still have clumps and everything is mixed together, add a LITTLE more sawdust. Once it's all mixed, line a board with wax paper. Place the sawdust on the wax paper and put it in a place that no one will mess with it (animals, ie cats can be a bane on this one). Now you let it dry. This can take up to 2 or 3 days depending on thin of a layer you put on the wax paper. Mine is pretty thick as I'm running out of room for all the projects I have going on at the moment. I'll check it every day for the next 3 days, stirring it up when I walk past it.
Once your sawdust is dry, take that empty bottle I told you to keep and fill it with water to give it some weight. Put your flock in a strainer (a good metal one, not a plastic one) and begin to sift the sawdust thru the strainer by using the water filled bottle.

Once you sift it, you will be left with odds and ends that wouldn't fit thru it. You can either pitch the remains or save it for use later. Sift it again using the same technique and your done. Why sift it twice? I found that by doing it twice, I remove all of the bigger pieces and am left with a much finer material.


Mission complete - dark green flock for trees that need to be flocked.


 Cut the tapered ends of the paint brush to the desired hieght(s) and mount it to a chipboard circle. I used crazy glue gel. *I have learned NOT to do this, use a hot glue gun to attach these. It provides a much more secure bond*


 Coat the tree with a spray adhesive and add the flock from the top. Once this is done, set the tree aside and let it dry. I finished up 4 of the 5 last night and here is how they look once it's all said and done.
 Terrain up the base after this is dry and it's all done. Coat everything with a good matt sealer. That will help keep the flock on the trees as well.

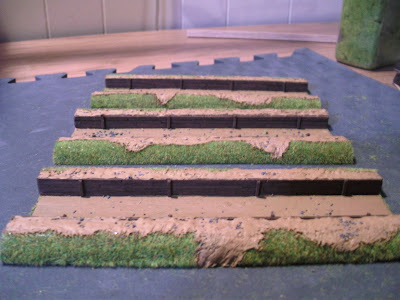
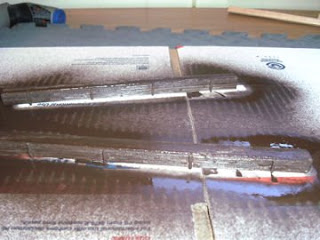
 Now that this has been glued firmly to the foam, it's time to clean up the road. For this, I will be using a thin layer of brown caulk. I spread it with my finger to cover up all the road surfaces. I let that start to dry and scattered some ballast over it lighltly. Once the caulk looses it's shiny color, it will be dry and I can start painting it.
 Now that this is dry, I'll put a wash of dark brown over the top of caulk. Again, it's hurry up and wait time as it dries. The good thing about doing this on the dining room table is there is a ceiling fan. Speeds drying time!
 The overall measurements for this table will be slightly larger and 4 ft by 6 ft because of the edge trim that goes around it. But that's okay as the table this will be on will be larger than 4 ft by 6 ft. So that's okay.

 If you look in the upper left hand corner, you will notice that this is no more than a scan of a map from the game "Cross of Iron" from the classic ASL gaming system. I've added a grid system to it to help me get a feel for this as I go along. The thick heavy black lines divide the table into 2 foot square blocks. The thinner lines break them down into smaller grids of 1 foot square and 6 inch square respectively.
 These are good enough now to take the field. Well, after I put a few thin coats of sealer on them, but I want them to look even better. So it's time to hit the drawing board and see what else I can add to them!

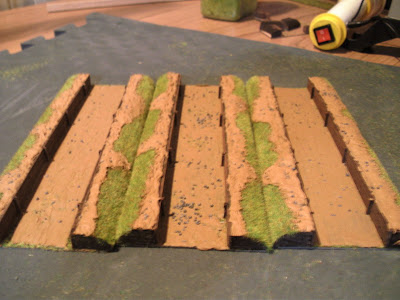
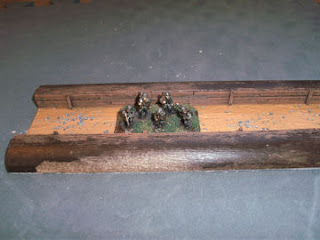
 Once the brown paint is dry, drybrush the balsa wood a lighter brown. I use a cheap acrylic paint from Walmart. Nothing special, but something to add a touch of detail. Once that's done, I lay a small line of super glue along the long edges of the floor tile. I do this before the caulk has had a chance to totally set. I also take a medium base for FoW and make sure that everything fits before gluing it down.
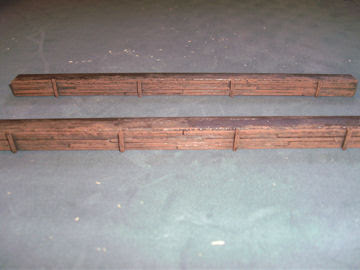